
Updated Wall Decor for Less Than $15!
Yes, please!
 I've been working on simplifying the color palettes in the rooms in our house, and I found myself staring at this wall in our kitchen with an old brassy mirror and black sconces. I wanted to give it a clean, updated look, but I didn't necessarily want to spend the money on new decor. The answer? A lil paint!
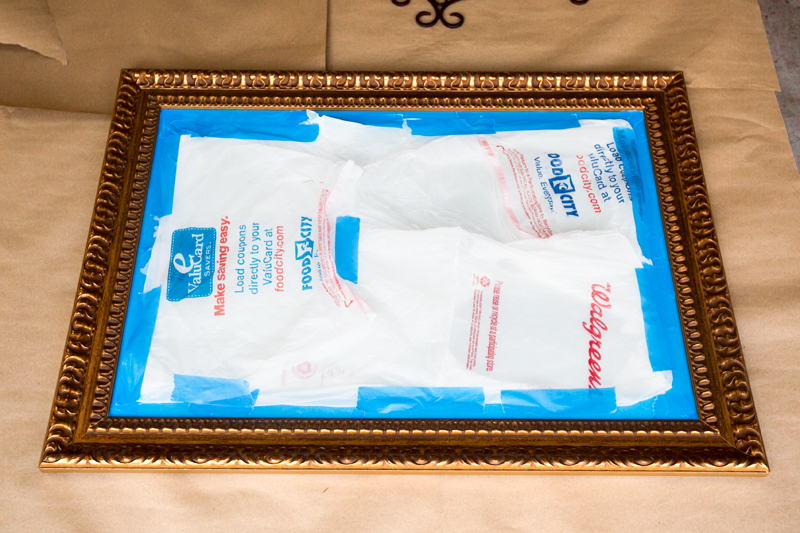 First, I placed the mirror onto some butcher paper on the floor of my garage. Using painter's tape, I carefully taped off the edges of the mirror. Next, I cut open some old plastic grocery bags and taped them down to cover and protect the surface of the mirror. Finally, I wiped down the frame itself to make sure it was free of dust and dirt.
 I used this spray primer to apply a very light base coat to make sure that the paint had something to stick to. I let it dry for about an hour before applying the final layers of paint.
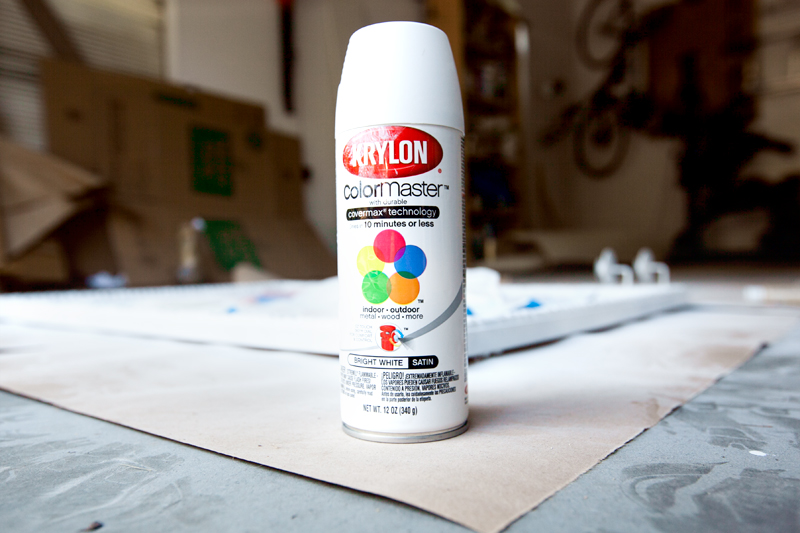 Once the primer was dry, I started applying the paint! I used this satin finish white spray paint. I chose satin instead of gloss because I wanted a mostly matte surface to give the frame a vintage-y look.
 I did two full coats of white on the frame and let it dry for 2 hours before moving on to the last steps!
 The candle holders only needed one coat, but there were a lot of tricky little nooks and crannies, so I did have go to back and fill in the places I missed.
 I knew I didn't want the finished frame to be stark white, but I also didn't want it to be too beige. I thought about doing an antique or distressed finish, but that wasn't quite what I was going for either. In the end, I ended up buying this small bottle of beige acrylic paint.
 Next, I used a new, clean kitchen sponge and squeezed out a small amount of the beige acrylic paint.
 Then I smooshed the sponge together so that most of the excess would be spread out across the surface.
 I blotted the beige paint onto the frame and then, using the clean section of the sponge, immediately wiped it off and spread it around, leaving just a thin, uneven hint of the top color.
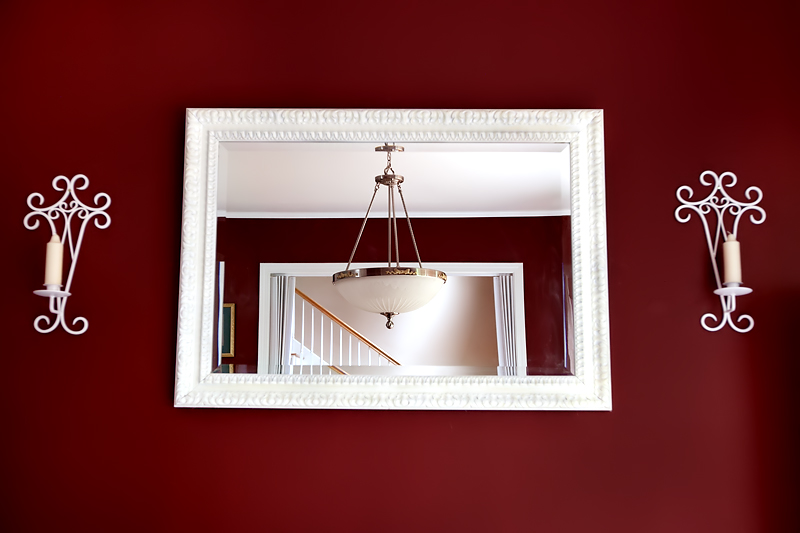 And here's the result. I really like how this turned out. I love the stronger contrast against our dark red walls, and it gave the old decor a more updated look for less than $15 in materials!
 Here's the difference in the candles! They pop out so much more against the wall color now!
 The final before and after. Big difference!
Anthony
Most people I talk to have no idea that shampoos that grow your hair fast (of course with no sulfates, no parabens or DEA) are even a thing. Hair styling enthusiasts are now able to attain longer hair and achieve more options. Certainly worth investigating.
Whether you're addressing alopecia, hair damage, preventing scalp disorders, fast hair growth, hair health generally, similar rules apply.
As a rule of thumb, you have to steer clear of hair products and treatments that include chemicals like parabens, DEA and sulfates.
What is beneficial for your hair is healthy for your skin also.
Clearly your content on this page is so useful for various reasons. It stays away from the common mistakes and errors so many fall into: utilizing ineffective alternatives. Thank you!
Brenda Wallace
The makeover of your mirror and sconces is beautiful !
I am inspired to do the same with our old brass colored antique looking mirror!
Thanks for sharing !
Eric
I like your site!I wanted to reach out to you and see if you would be willing to test out some of my glass etching craft supplies for free for feedback. Would you be interested? Please let me know via email if possible. These will be shipped directly to you at no cost. I am looking forward to your reply. I can't wait to hear from you! Eric
Sherry
I go to see day-to-day a few sites and sites to read content, but this webpage provides feature based
articles.
Kara B
Looks great! Really pops on those red walls! Now you just need to paint something larger, like a table. 😉