
This easy chocolate peanut butter pie is a simple dessert made with a flaky pie crust, fluffy peanut butter layer, and chocolate ganache on top.
Ingredients Needed To Make This Pie
- A Pie Crust: I chose to use a standard pastry crust in this recipe to keep the recipe from being too sweet. For convenience, you can use a pre-made rolled pie crust (I tested this recipe using a Simple Truth Organic rolled pie crust from Kroger). Just make sure the crust comes to room temperature before attempting to unroll it, or it can crack. Substitutions: You can use an Oreo cookie crumb crust or graham cracker crust if you want!
- Peanut Butter: Any creamy peanut butter will do. I used a no-stir variety of natural peanut butter (again, to control the sweetness) but regular creamy peanut butter will work great! I don't recommend using the thinner natural peanut butters with lots of oil separation, as that can cause the peanut butter layer to become too runny.
- Cream Cheese: You'll need half a block or 4 ounces of regular cream cheese, softened to room temperature. I know it's annoying to only use half a block - I get it! Throw some bagels into your shopping cart to use up the rest of it - win win!
- Frozen Whipped Topping: The fancy generic way of saying Cool Whip. If you're not a fan of the ingredients in Cool Whip, I urge you to try TruWhip (not sponsored). It has a much more natural list of ingredients and tastes almost exactly the same!
- Chocolate Chips: One bag of your favorite semi-sweet chocolate chips is the base of the ganache layer.
- Heavy Cream: Heavy cream or whipping cream will work.
Do I Need Special Equipment?
This is a simple pie that doesn't require any fancy schmancy kitchen tools. You likely already have the equipment that you need, such as:
- 9" Glass Pie Plate - I like using glass pie plates because of how it gently and evenly conducts heat to the baking pie crust, with an added bonus of being able to see the bottom of the crust to check that it is not getting too brown.
- A Good Hand Mixer - I love this mixer so much that I rarely pull out my heavy stand mixer unless I'm making something really labor intensive.
- Mixing Bowls - these are so pretty, come with lids, and are microwave safe, so you can use them for making the ganache in this pie!
- Nonstick Spatulas - I have these in several shapes and sizes and use them every day. A kitchen must have.
What Does It Taste Like?
When choosing which layers to use for this pie, I wanted to focus on a nice balance of flavor without causing the pie to be too sickly sweet - a problem that plagues many no-bake pie fillings.
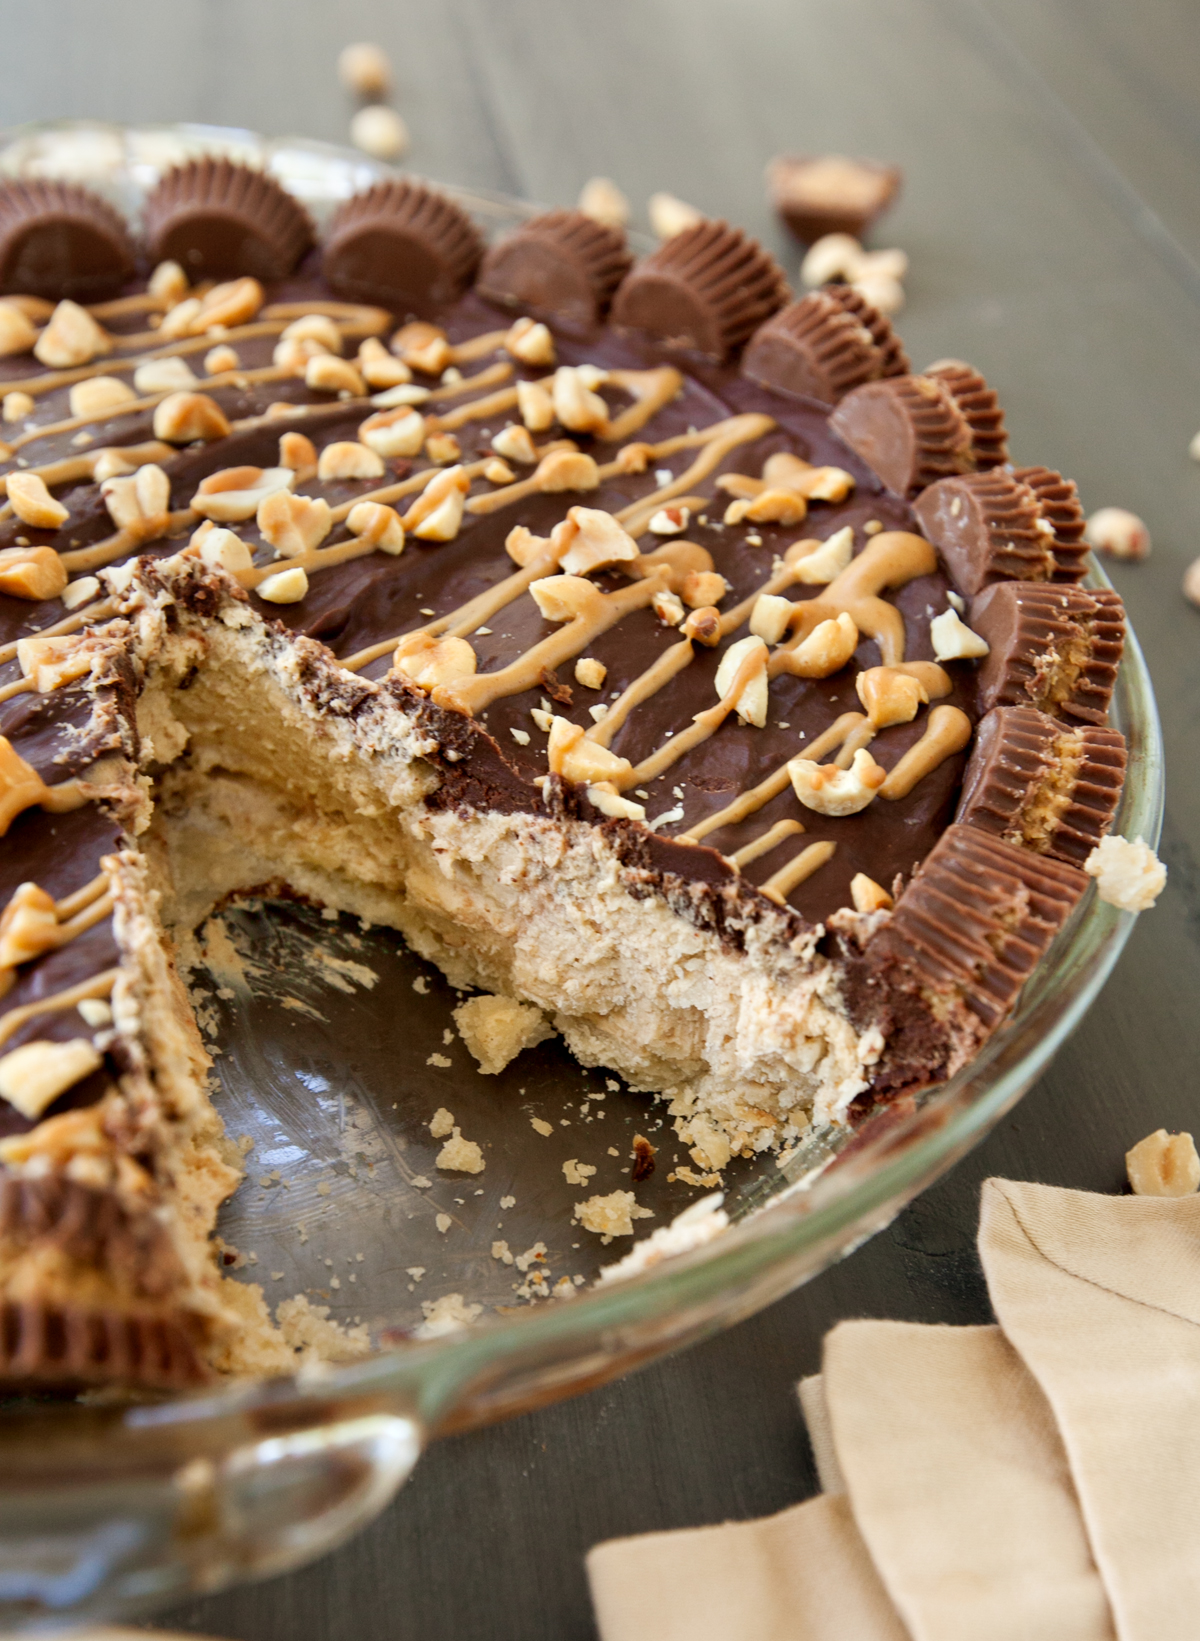
On the bottom you've got a flaky, crisp baked pie crust that adds structure to the slices. In the middle is the peanut butter layer that is made creamy by the cream cheese and fluffy from the whipped topping. The use of natural peanut butter (with no additional added sugar) helps to control the sweetness and I love the smooth, lovely texture!
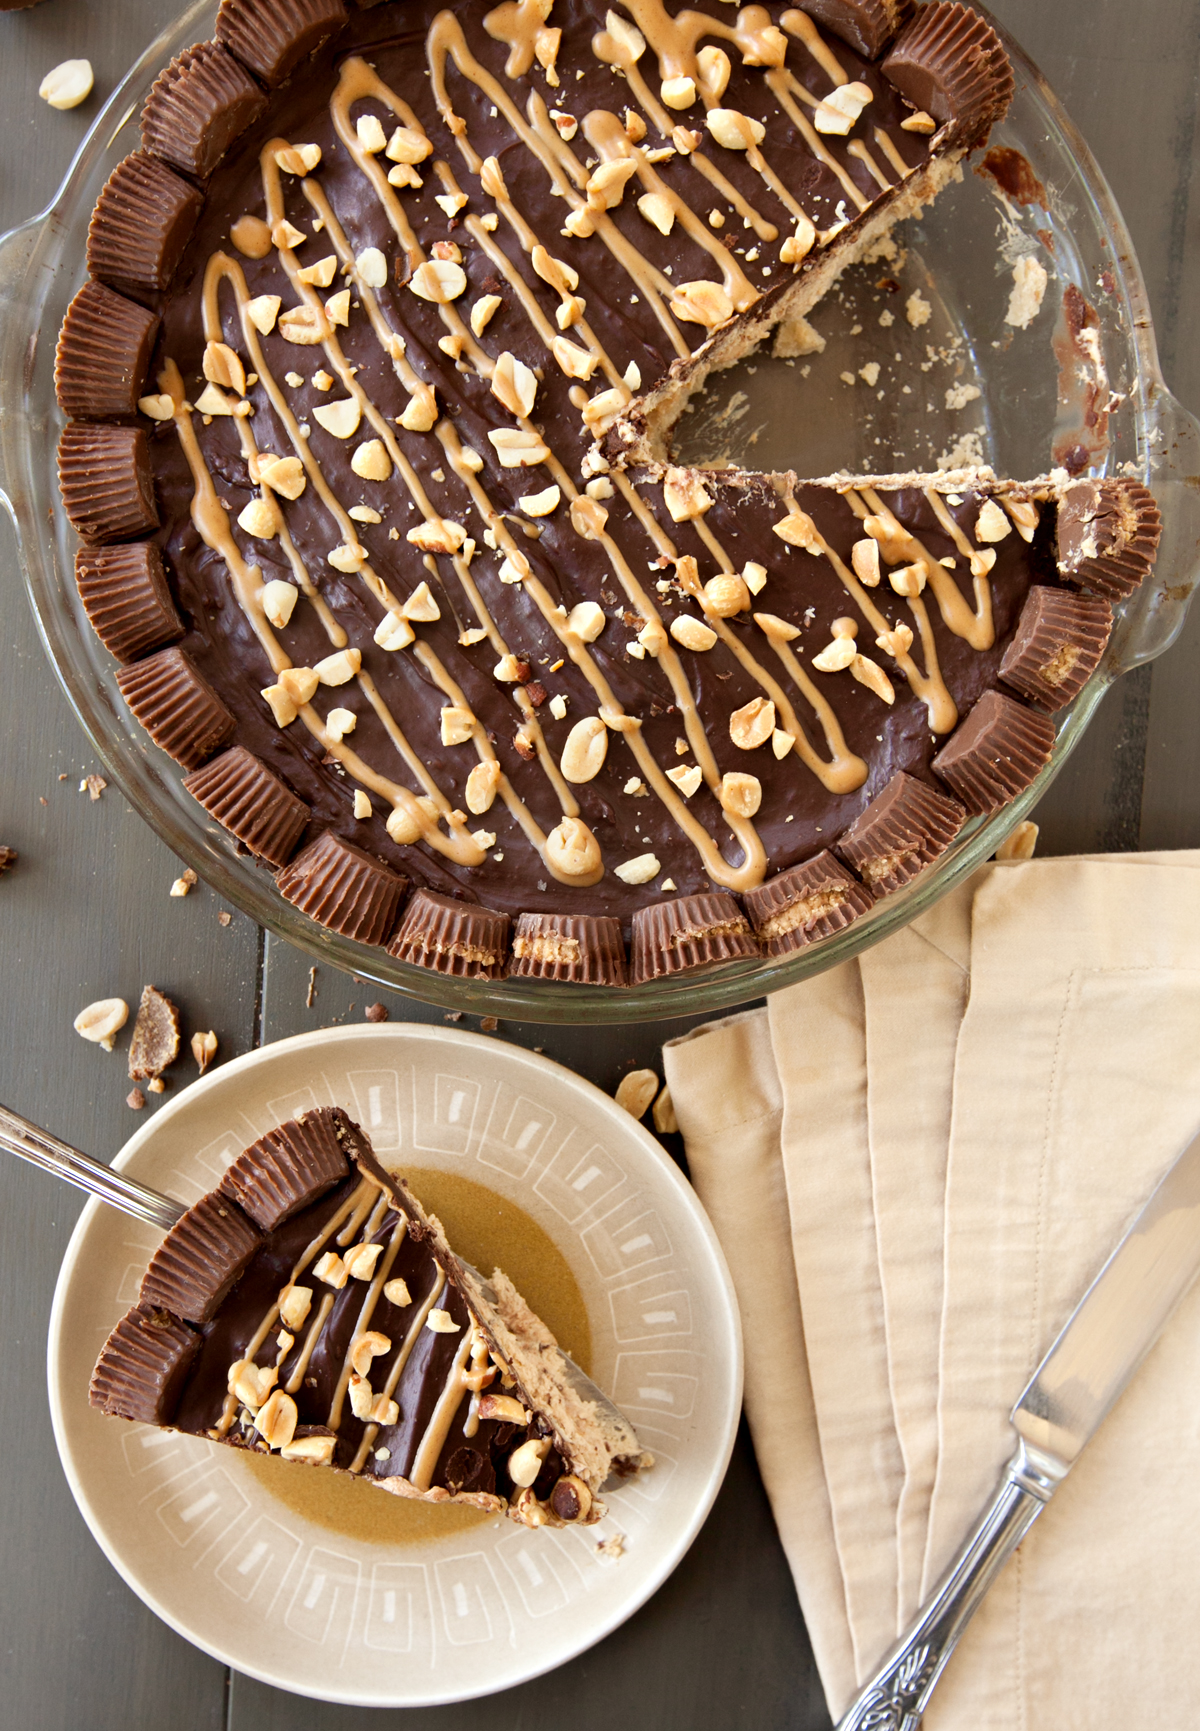
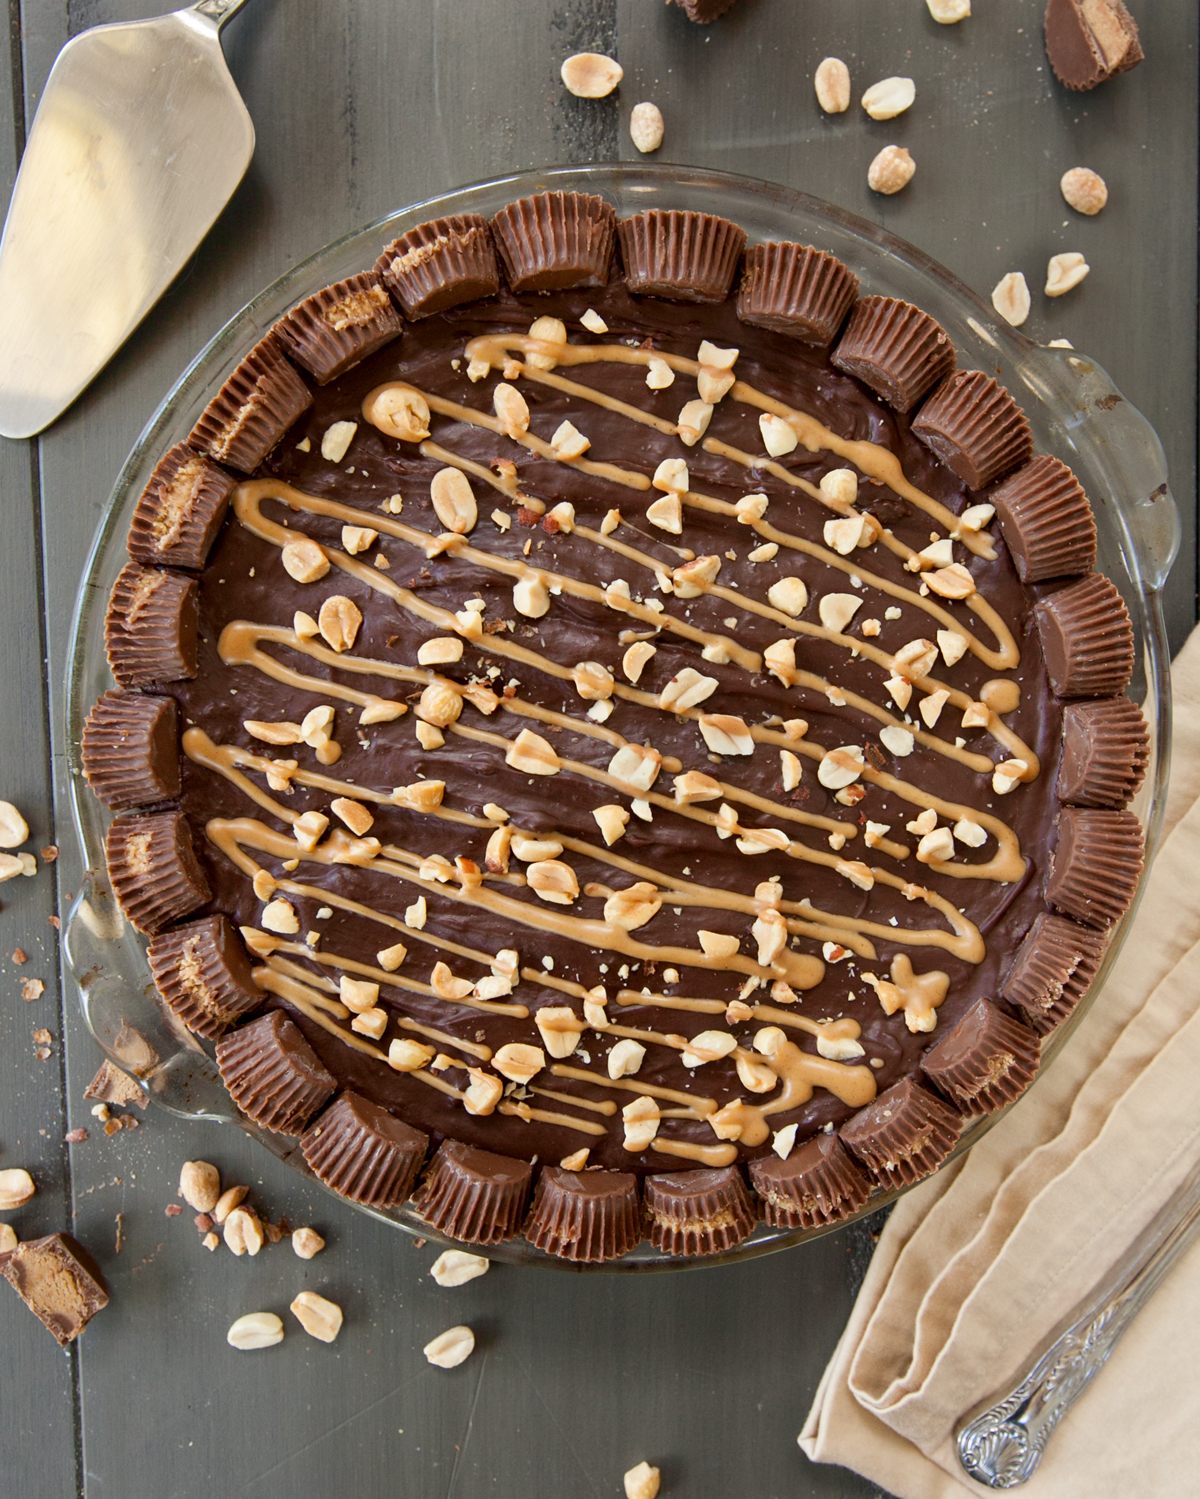
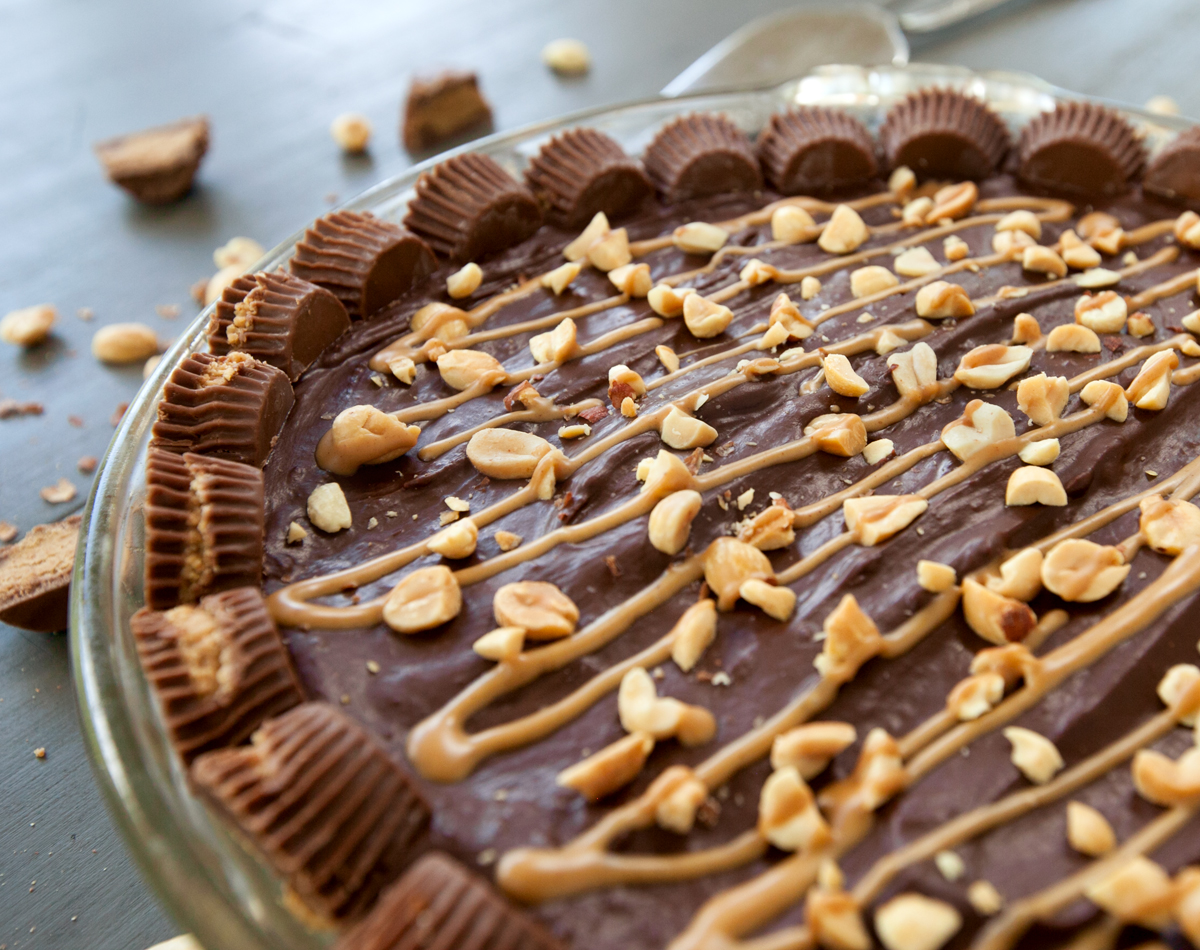
The top layer is a simple chocolate ganache made from semi-sweet chocolate chips and heavy cream. The ganache hardens as the pie sets and creates a rich, structured chocolate layer perfect for decorating.
Can You Freeze This Pie?
Yes, you can! In fact, you can even eat this chocolate peanut butter pie straight out of the freezer if that suits your fancy - just be careful when slicing it up. As with most things, the key to freezing this pie successfully is preventing freezer burn. Wrap the top of the pie tightly with foil and then top with an airtight layer of plastic wrap for best results.
Tips For Success
- Docking the pie crust: Instead of using pie weights, I chose to dock the pie crust before baking it. This is a technique that involves using a fork to prick the entire crust on the bottom and up the sides. This is an alternative method to using pie weights to prevent shrinking and puffing, especially if you either don't have weights or don't want to fuss with using rice or beans instead. You'll want to prick the crust at least 50 times in order for this method to be successful. The crust should look totally covered in little fork marks when it goes into the oven.
- Mix Until Smooth: Part of why this pie is so luxurious is the smooth texture of the filling layers. Make sure you mix, scrape the bowl, and mix again until both the peanut butter filling and the ganache layers are completely smooth.
- Let It Cool: The ganache layer will still be quite warm after you get it all mixed together. Wait until it cools down before adding it onto the peanut butter layer, otherwise the heat will cause the layer beneath to melt and the two will mix together.
- To Get Clean Slices: Make sure the pie has had ample time to chill in either the refrigerator and freezer. Run a sharp knife under hot water, wipe it dry, and use it to slice the pie. The hot knife will melt the ganache on contact and make it easier to create pretty slices.
Fun Variations
- Add a sprinkle of coarse sea salt to the ganache layer.
- Instead of peanut butter, try cashew butter or almond butter.
- Use dark chocolate chips instead of semi-sweet.
- Use an Oreo or graham cracker crust instead of a pastry crust.

Easy Chocolate Peanut Butter Pie
- Total Time: 3 hours 20 minutes (mostly chilling)
- Yield: 8 - 10 slices 1x
Description
A flaky pastry crust, fluffy peanut butter layer, and chocolate ganache make this easy chocolate peanut butter pie one not to miss!
Ingredients
- 1 rolled 9-inch pie crust (premade or homemade)
- 1 cup no-stir natural creamy peanut butter
- 4-ounces (half a block) cream cheese, softened
- 1 8-ounce container frozen whipped topping, thawed
- 1 ½ cups (12 ounce bag) semi-sweet chocolate chips
- ½ cup heavy whipping cream
- Optional: miniature peanut butter cups, chopped peanuts, and extra peanut butter for decorating and drizzling.
Instructions
- Preheat oven to 375. Place the pie crust in an ungreased 9" glass pie plate and press firmly against the bottom and sides of the plate. It is okay if the crust doesn't reach the top of the pan.
- Use a fork and prick the sides and bottom of the crust at least 50 times. Bake for 10-12 minutes or until lightly golden. Remove crust from oven and allow to completely cool.
- In a large mixing bowl, use a hand mixer to combine the peanut butter and cream cheese, mixing until smooth. Fold in the whipped topping and mix until smooth.
- Spread peanut butter filling into the cooled pie crust and place into the refrigerator while you make the ganache.
- Add the heavy cream to a medium-sized microwave safe bowl. Microwave in 20-second increments until the cream is hot but not boiling.
- Sprinkle the chocolate chips over the cream and cover. Let sit for 3-4 minutes so that the chocolate begins to melt.
- Use a nonstick spatula to stir the chocolate and encourage it to finish melting. Continue stirring until mixture is completely smooth. Allow the ganache to cool to almost room temperature.
- Give the ganache a final stir and then spread it onto the pie. It's okay if the ganache covers the edges of the pie crust, but if you want the crust to show just discard the extra ganache.
- Decorate pie with miniature peanut butter cups, chopped peanuts, and/or drizzled warm peanut butter.
- Chill for about 30 minutes uncovered, then cover with foil or plastic wrap and chill 3-4 hours before serving.
- To help with making even slices, use a sharp knife run under hot water.
Notes
I prefer a standard pie crust to keep the pie from being too sweet, but you can absolutely use a graham cracker or Oreo cookie crust for this pie.
Recommended Equipment: 9" glass pie plate, nonstick spatula, mixing bowls, hand mixer
Cool Whip is the favorite frozen whipped topping, but I have found that I love Tru Whip for its more natural list of ingredients.
You can use regular creamy peanut butter if you don't have natural. I don't recommend using natural peanut butters that are very thin with lots of oil separation, as this can cause the peanut butter layer to be too runny.
- Prep Time: 10 minutes
- Cook Time: 11 minutes (pie crust bake) + 3 hours chill time.
- Category: Dessert
- Method: Oven + No Bake

Do you love this recipe and want to be able to find it later? Use the image below to pin to your Pinterest boards, or share with your friends on social media by using the buttons at the top and bottom of this post. Thank you for visiting my blog!

Can you use nonstick pan for baking pie crust
Sure! if it's dark metal I'd lower the oven temperature by 25 degrees and watch it a little more closely, otherwise you should be fine.