
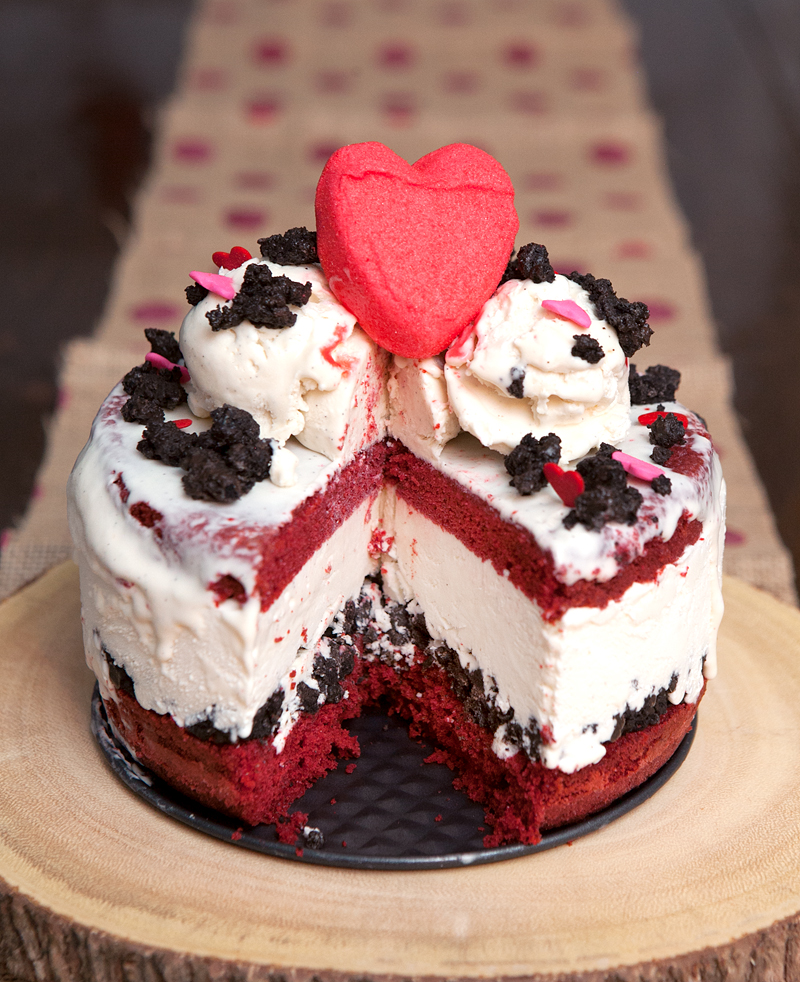
 Even if you aren't the biggest fan of Valentine's Day, the holiday is a perfect excuse for playing with red velvet creations. Though it's the dead middle of winter and we just experienced yet another snowfall, I found myself wanting to make an ice cream cake.
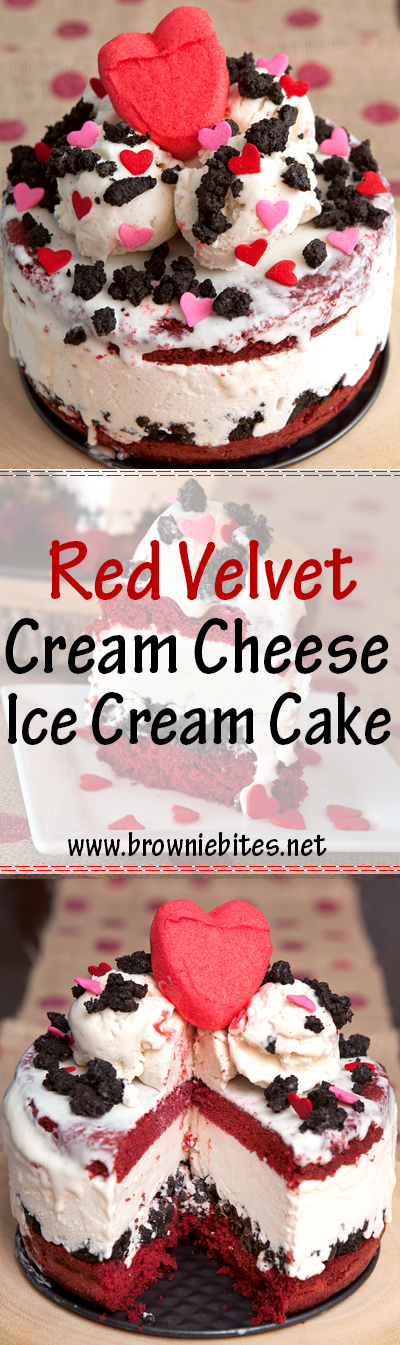
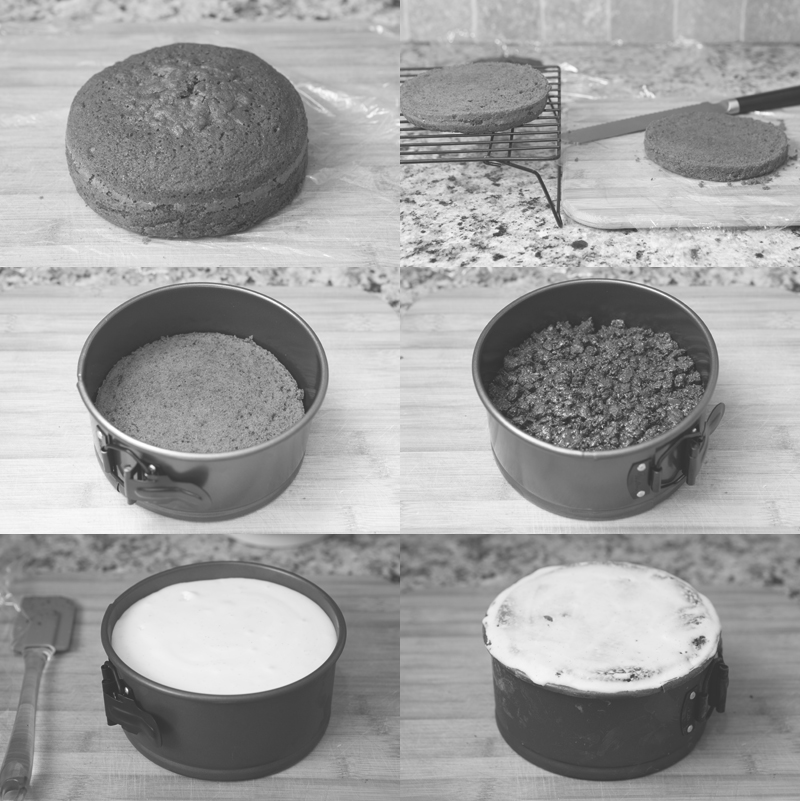 Using a springform pan makes putting together an ice cream cake is easy peasy. I didn't want to make a cake that was too large since it was meant to be a treat just for us, so I used a cute, tiny 6-inch springform that was perfect!
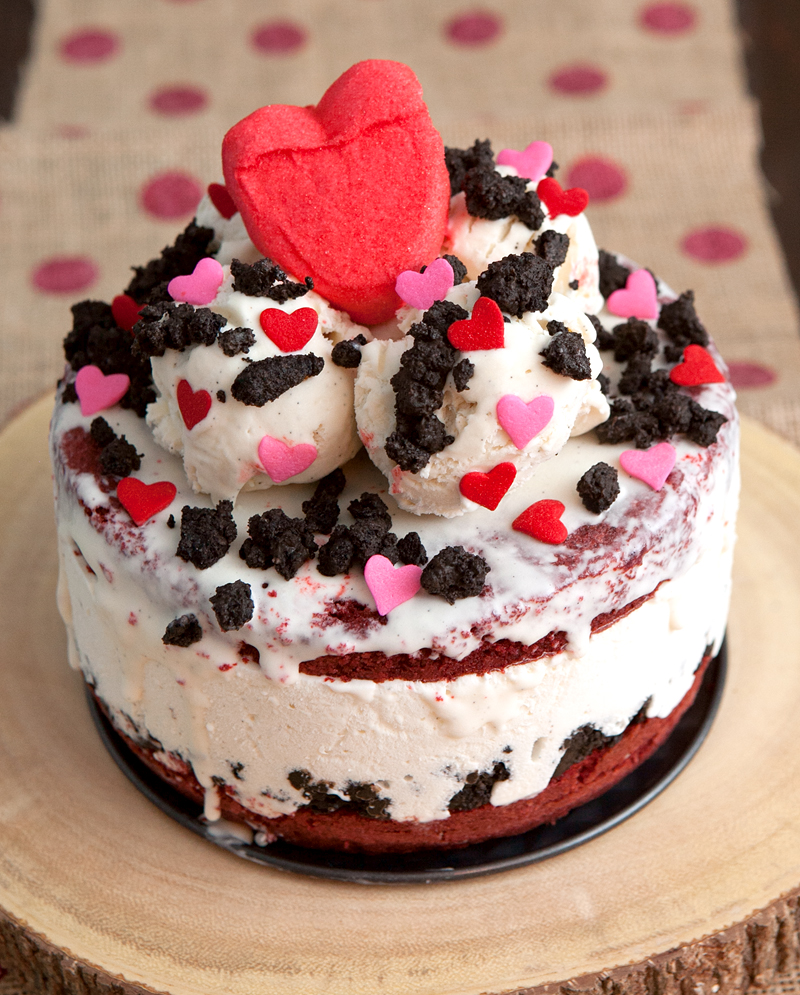
I used a simple no-churn cream cheese ice cream and added in a layer of homemade "chocolate crunchies" like the kind you find in store-bought ice cream cakes. Because in my book, you just can't have an ice cream cake without those little crunchies.
I considered frosting the entire cake in whipped cream like what I've seen from some leading cake shops similar to Anges de Sucre cake shop, but when I took it out of the pan it looked so pretty with all of the layers visible that I just couldn't bring myself to cover it. Instead, I decided to decorate the top with extra ice cream scoops, crunchies, and some Valentine's Day Sprinkles. The big pink heart is a PEEP from their holiday line.
What a treat!
Print
Red Velvet Cream Cheese Ice Cream Cake
- Total Time: 2 hours
- Yield: 1 6-inch cake
Ingredients
- For the Ice Cream:
- 1 8 oz. package of cream cheese at room temperature
- 1 14.5 oz can of sweetened condensed milk
- 1 TBS vanilla bean paste (or extract)
- 1 pint heavy cream
- For the Cake:
- ¾ cup cake flour
- ¼ tsp baking soda
- 2 tsp (heaping) unsweetened cocoa powder
- pinch of salt
- 2 TBS unsalted butter, softened
- ½ cup white granulated sugar
- ¼ cup canola or vegetable oil
- 1 large egg at room temperature, separated
- 1 tsp vanilla extract
- ¼ tsp white vinegar
- red food coloring
- ¼ cup buttermilk, room temperature
- For Chocolate Crunchies:
- 1 sleeve Oreo cookies (12-16 cookies)
- Chocolate Magic Shell topping
Instructions
- For the Ice Cream:
- Place a large glass or metal bowl in the freezer to use for the whipped cream. Meanwhile, in another bowl using a stand or hand mixer, beat together the cream cheese, sweetened condensed milk, and vanilla bean paste or extract until smooth.
- In the chilled bowl, using a hand mixer or the whisk attachment of a stand mixer, beat the heavy cream to soft peaks.
- Fold the cream cheese mixture into the whipped cream.
- Pour the mixer into a freezer safe container and place into the freezer.
- For the Cake:
- Preheat oven to 350F. Grease and flour a 6-inch round cake pan. Set aside.
- In a small mixing bowl, stir together flour, baking soda, cocoa powder, and salt. Set aside.
- In a different bowl, use a hand mixer to beat the butter until smooth and creamy. Add the sugar and mix until creamed together well, scraping down the sides as needed.
- Add the oil and mix for an additional 2 minutes, then add the egg yolk and vanilla extract and beat until combined. Add the buttermilk, vinegar and enough food coloring to achieve desired color. Mix well.
- With mixer on low speed, add the dry ingredients in 2 additions, mixing until just incorporated. Do not overmix.
- In a separate small bowl, whisk the egg whites until foamy (you don't need to have peaks) Gently fold the whites into the wet mixture with a rubber spatula.
- Transfer batter into cake pans and bake on center rack for 20-30 minutes or until a toothpick inserted into the center of the cake comes out with a few moist crumbs. Your oven may vary, so I recommend checking the cake starting at 20 minutes.
- Allow cake to cool in the pan for about 20 minutes and then remove it and allow to finish cooling on a wire rack.
- For Chocolate Crunchies:
- Mix together cookie crumbs and enough Magic Shell topping to make them stick together in a paste of desired texture (you really can't mess this up - use a little or use a lot!). Set aside.
- Assemble the cake:
- Use a long serrated bread knife to slice the cake layer in half. Place the lower slice in the bottom of a 6-inch springform pan. Cover with a generous layer of chocolate crunchies, and then cover with a thick layer of ice cream, leaving about ¾ inch of space at the top of the pan. If the ice cream has become to thick, allow it to soften on your counter for about 10 minutes.
- Place the remaining cake layer slice on top and, if desired, fill in any gaps between the cake and the pan with additional ice cream. It is okay if the top of the cake layer extends above the top of the pan. Freeze for 3-4 hours.
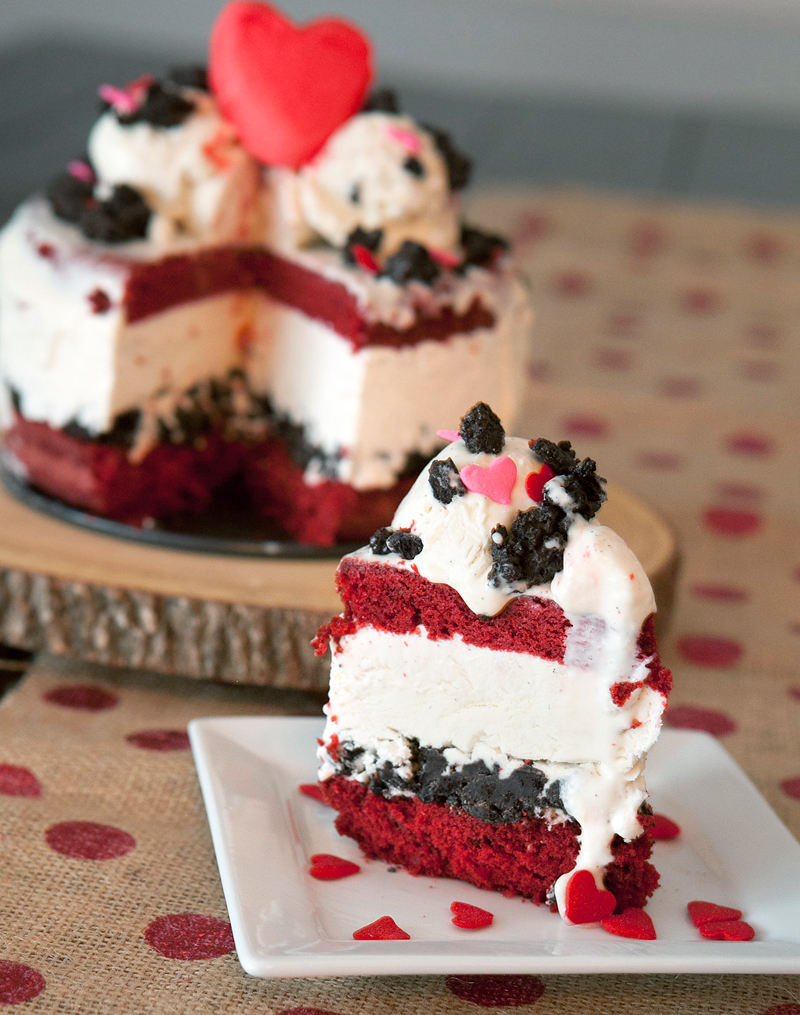
- Take the cake out of the freezer and let it warm up for about 5 minutes. Remove the sides of the pan and decorate the top of the cake with additional scoops of ice cream, chocolate crunchies, and sprinkles of your choice. Slice with a large knife. If cake is too firm, run the knife under hot water before slicing.
Notes
* This recipe yields much more ice cream than you will use for the cake. Since the ingredients used would be awkward to halve, I recommend serving up the cake with some extra scoops, or eat the extra by itself!
- Prep Time: 2 hours
Arika
Where does the buttermilk go?
Erin
Whoops, sorry for that error - thank you for pointing it out! You would add the buttermilk before adding the food coloring to the wet mixture.
myicecreams
Cool thanks for this what about this please I got akready from this:http://myicecreams.com/