
Over the last several months Matt and I have been having a serious love affair with spray paint. As any homeowner knows, there seems to be an endless and ever-growing list of cleaning, maintenance, and updating tasks that need to be done to keep our home looking nice. As any homeowner also knows, going around replacing everything that needs an update can also get really expensive really quickly, so we are always on the lookout for some do-it-yourself ways to spruce up our home without breaking the bank. If you visit alextrendpainters.ie, you'll see that spray paint has been a major player in many of our little home improvements, and here are some of the projects that we have done!
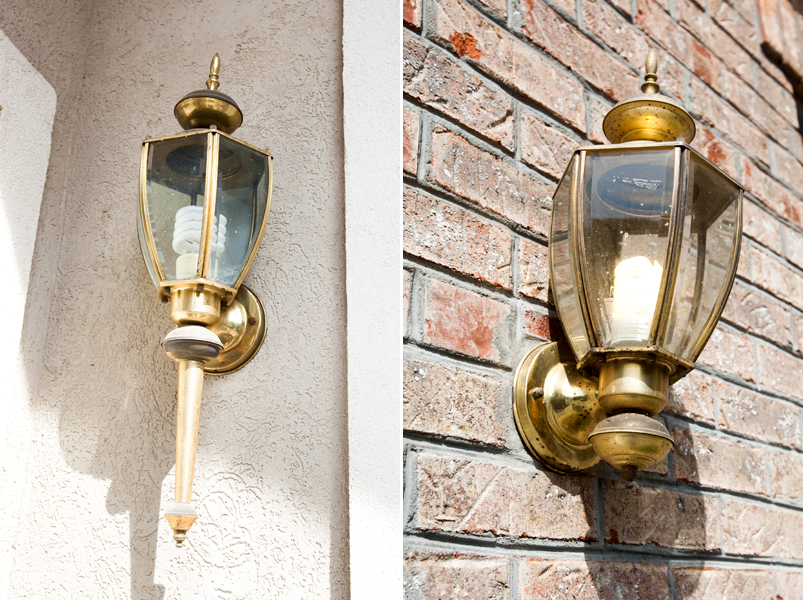
All of the original fixtures outside of our house are brass, and they were looking pretty rough. We were caught between wanting them to look better, but not wanting to buy all new fixtures. Spray paint was the perfect remedy.
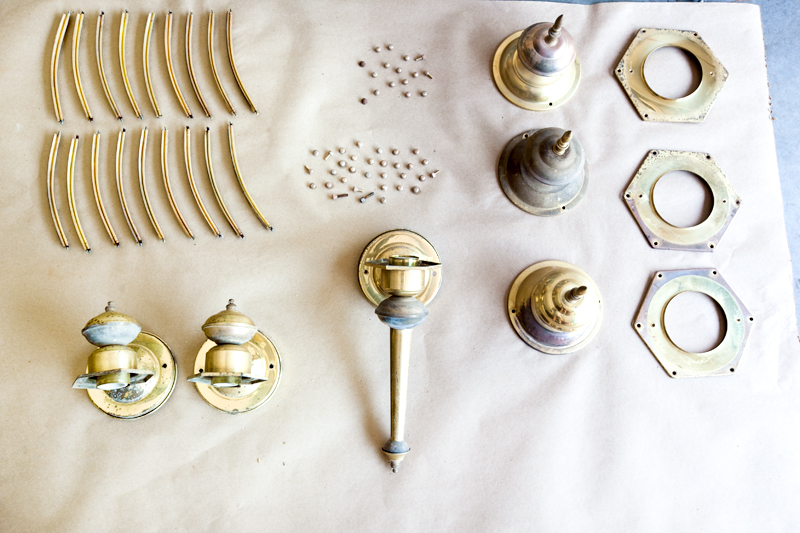
First, we took down the lights and removed the bulbs and glass panels using the best laser levels. As you can see, there was quite a bit of tarnish and baked on dirt. Before we could paint, we needed to clean them up. We used old rags and a mix of plain ole warm water and a little CLR for the more stubborn spots. You want to get the metal (including the screws!) as clean as you can or your paint can look bumpy and will chip more easily.
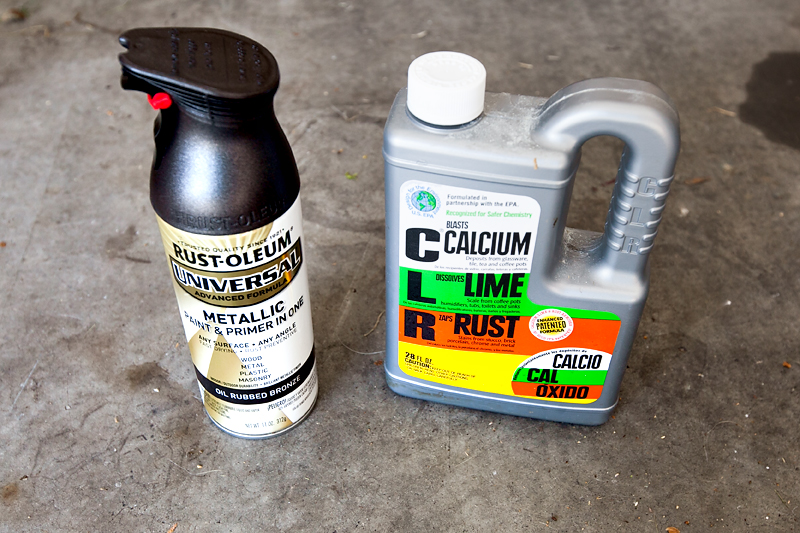
We love Rust-Oleum spray paint! We've used it for several projects around the house. We got it on www.rykerhardware.com. It sticks well to many different surfaces and it comes in lots of colors and finishes. For the lights, we chose a metallic finish paint+primer combo, and the color was oil-rubbed bronze.
It will most likely take 2-3 passes with the paint to get a good coverage on all sides. Let the surfaces completely dry between coats so you can turn the pieces as needed to make sure all the little nooks and crannies are coated with the paint. Once you're all done, let it cure for about a day before hanging.
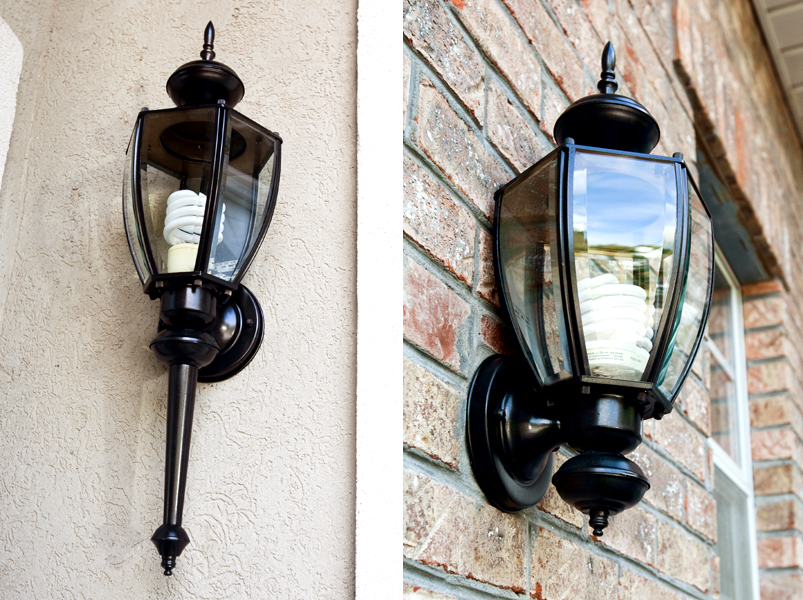
So much better, and all for the cost of a can of paint!
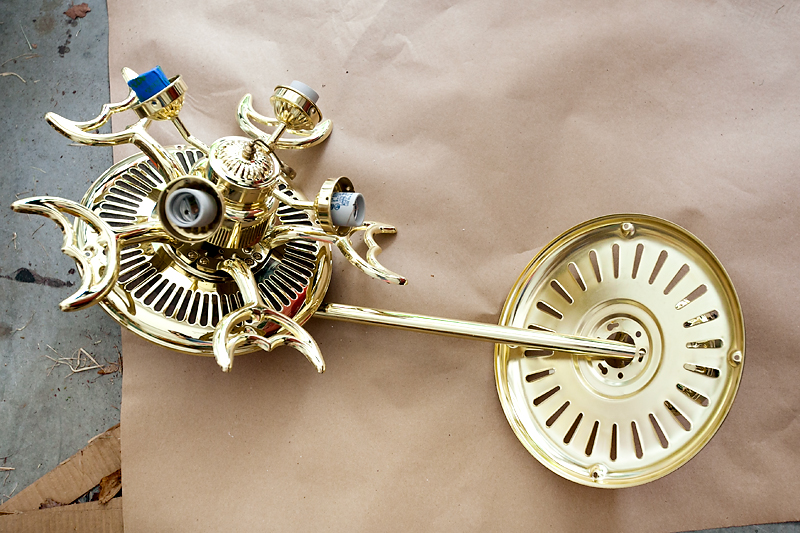
I recently blogged about redecorating our bedroom, and one of the final steps in that project was updating the brass ceiling fan. Similar to the outdoor lights, we didn't see the need in buying a new fan when the style of the current one was acceptable to us, it was just the wrong color! Spray paint to the rescue!
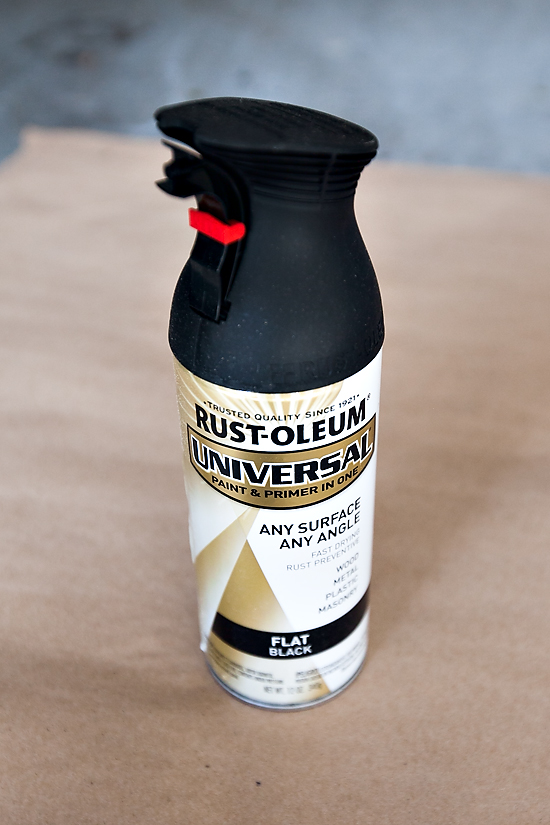
Once again, we used Rust-Oleum, and this time we chose flat black. The curtain rod in our bedroom is similar flat black, so we thought that color would be a good match.
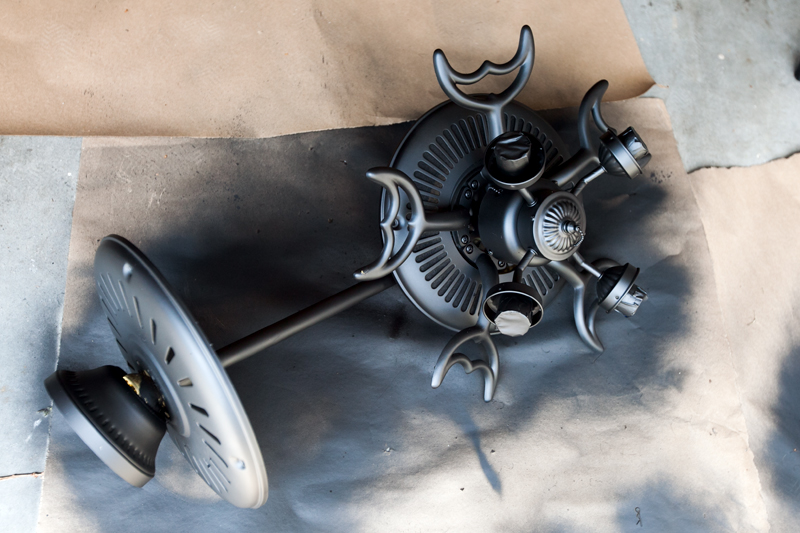
All ceiling fans are assembled differently, so you'll have to work with your individual fan to figure out the best way to get the whole thing painted. We removed the fan blades, glass bulb covers, and bulbs, and we taped up the area where the bulbs attach. Our fan doesn't allow you to totally disassemble it, so we had to finesse the little hidden areas with several rounds of spraying and drying as we rotated the loose pieces. It sounds a lot more complicated than it actually was. Thankfully, spray paint is pretty forgiving, so just keep working with it and use light coats to avoid any gloppy build-up. However, if you want a professional job done, you can hire painters to do the paint job, especially if you're going to do a whole remodel such as a bathroom remodeling.
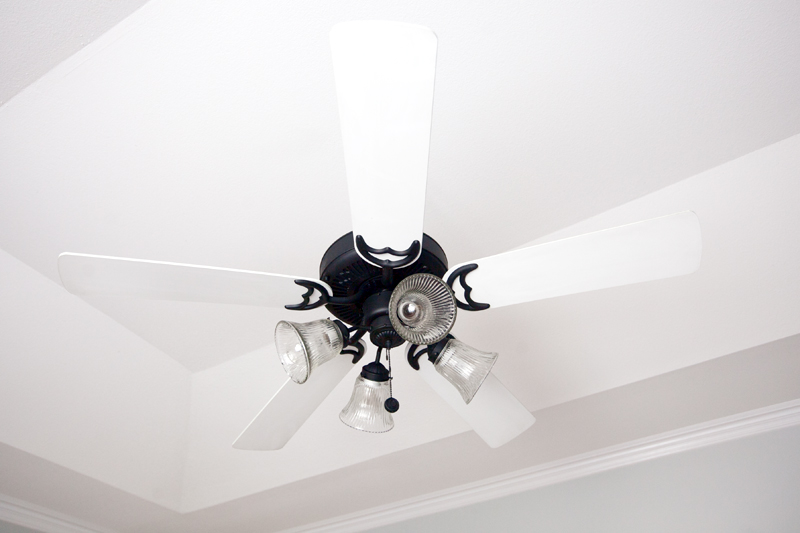
Much better, and no more brass! Most of it we recycled and got cash for brass Sydney.
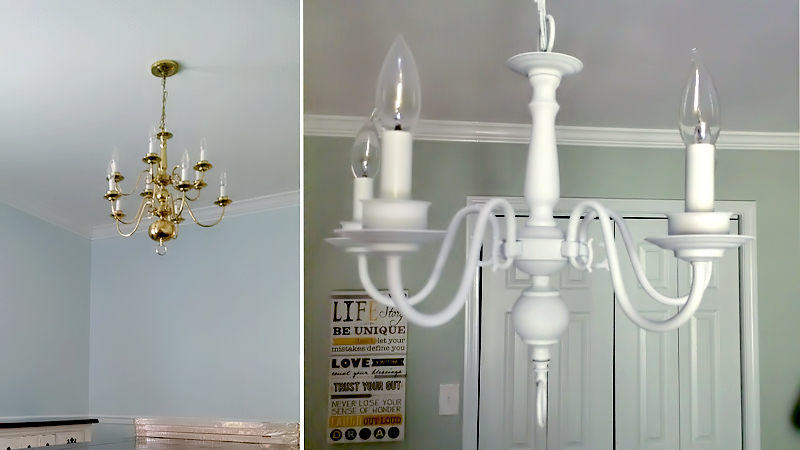
Apologies for the cell phone photos. Over the last few weeks we've been redecorating our dining room and baby's room at the same time. The nursery originally had a terrible ceiling fan with sagging blades, so the whole thing had to go. We were wondering what to replace it with when we remembered that our friends, Kara and Remington had the exact same chandelier in their dining room that we had in ours. They had the idea to unscrew the bottom tier and paint the rest of it to create a cute black light fixture for their office with the help commercial property maintenance experts. We totally stole their idea and did the same thing, except we used flat white spray paint et voila! A sweet little mini chandelier for our baby's room.
Oh oh - we'll definitely be doing blog posts on our newly redone dining room and nursery, so stay tuned for those posts very soon!
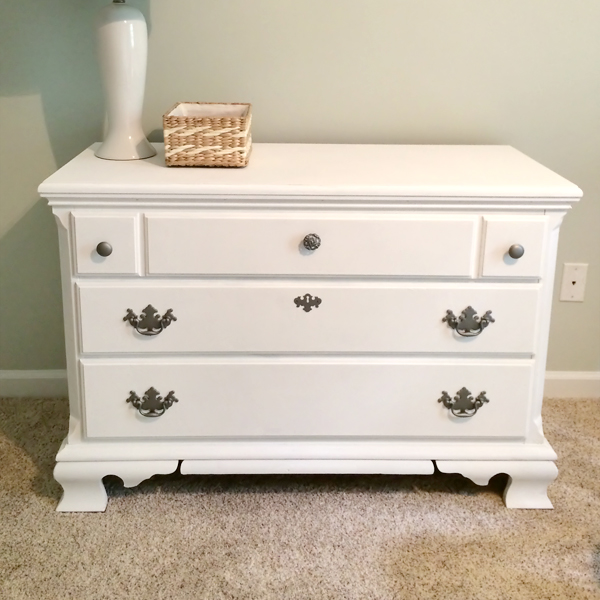
Spray paint is so versatile - we have used it on drawer hardware (shown above), curtain rods... pretty much anything that needs a little updating but doesn't necessarily need to be totally replaced. Give it a try!! We're totally addicted.
We are in no way affiliated with Rust-Oleum nor were we compensated for mentioning the brand in this blog - it's just the spray paint that we like to use!
Katherine
It looks so great. I know you un assembled the outdoor lights to clean them. Did you paint them un assembled or did you re assemble them to paint. Thanks so much!!
Erin
We painted them while unassembled, and then put them back together after they were dry. 🙂
Cat
I used Rustoleum antique gold in a jar and a 1inch brush.... rehabbed .doorknocker, 2 carriage lamps like yours, a "park bench" in front of door for the metal orrnamentation and legs, arms..the birdfeeder pole, and 3 brown wood frames that needed a gold pick me up. And still have 2/3 of the jar left. Amazing stuff.
Erin
Awesome! I love it!
Kara B
Everything looks so great! I think you all are way better at spray painting now than I am. 🙂