
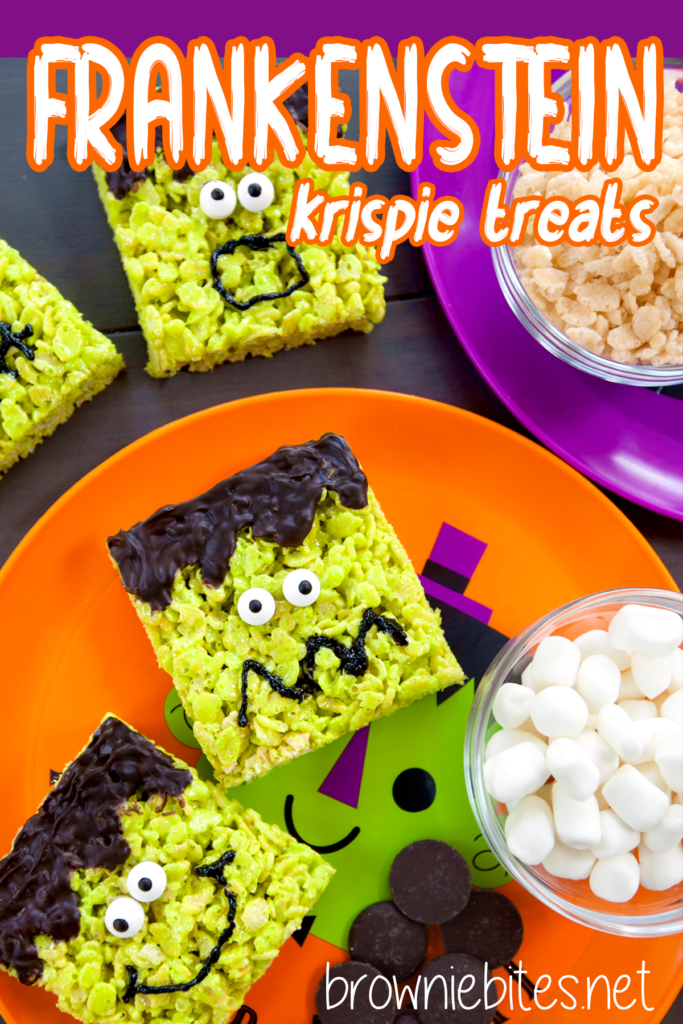
A classic easy treat gets transformed for Halloween with these adorable Frankenstein Rice Krispie Treats that are so simple to make the kids will love to help you out!

Why These Are Great
It's time we admit it fully, honestly, and out loud: Halloween is the best holiday. I mean, think about it. It's nothing but pure fun. Adorable decorations in electric green, orange, and purple. Carving Jack-O-Lanterns. Fun costumes and all of the creativity that goes into them. Spooky movies, whether fun or truly scary, that bring up all kinds of nostalgic feelings. There's no family drama on Halloween (well, not typically) and there's no lack of fun sweet treats around.
So there. Halloween is just the best, and you can make your spooky season even more fun this year by creating these easy Frankenstein Rice Krispie treats that are a blast to decorate for both kiddos and grown-ups!
What Ingredients Do I Need For The Treats?
To make Frankenstein Rice Krispie treats, you'll start with a classic recipe for cereal treats with my two secret extra ingredients:
- Rice Krispies cereal - Name brand tends to work the best, though I've had good luck with Kroger brand as well.
- Mini Marshmallows - A full 10-ounce bag is the perfect amount. I've had equal success with name brand (Jet-Puffed) and store brand, but whatever you use, make sure they are fresh and not stale!
- Butter - use the real stuff for best results.
- Salt and Vanilla Extract - my two extra ingredients I add to all of my cereal treats to make them extra yummy
What Do I Need To Decorate The Treats?
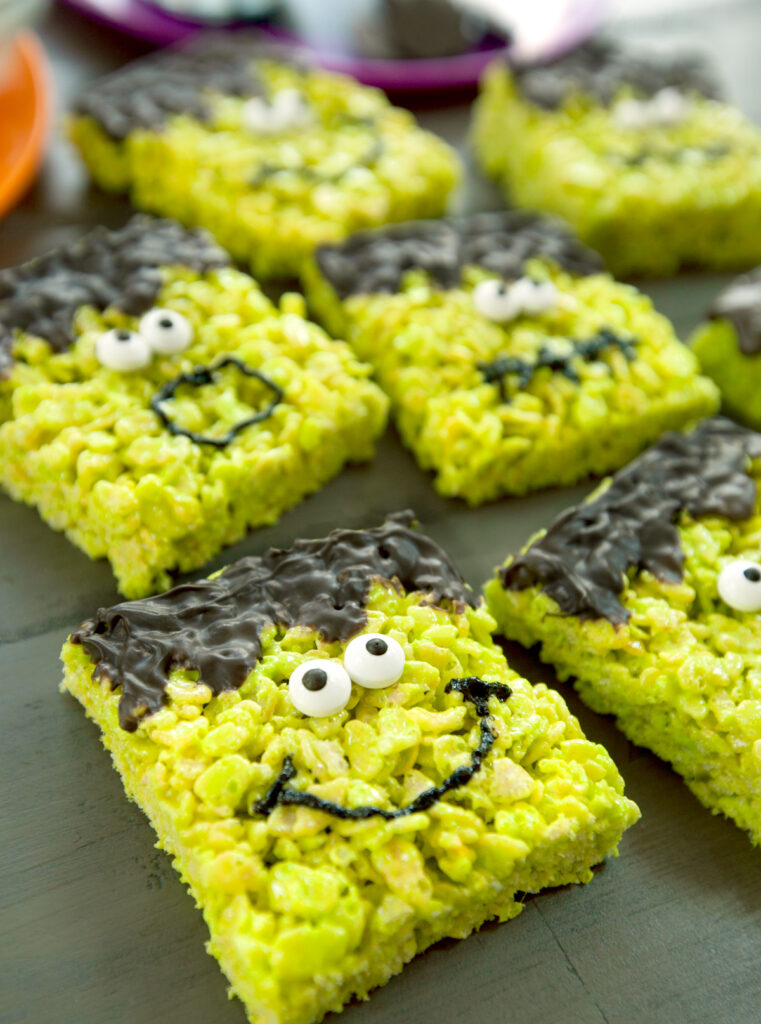
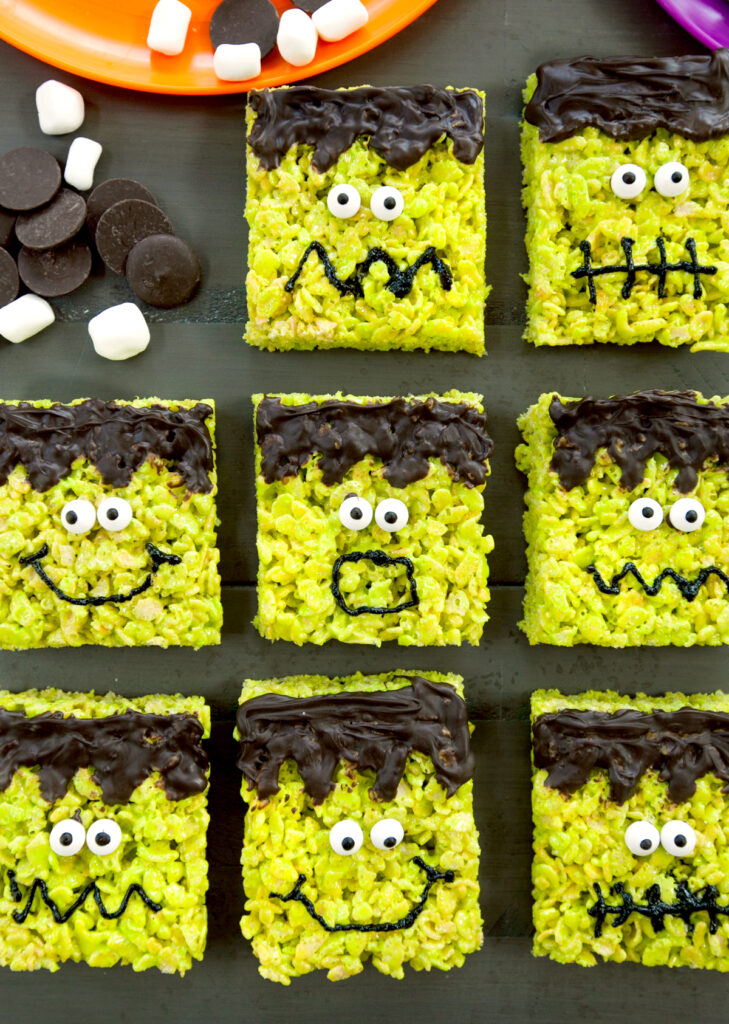
- Neon Green Food Coloring - neon or electric green food coloring has more of a Halloween-y hue than traditional greens. You'll mix the food coloring into the melted marshmallows while making the Rice Krispies treat base.
- Candy Melts - you can use true black or chocolate candy melts for making the hair and the mouths of the Frankensteins. You will also use a bit of the melted candy to glue the candy eyeballs onto the faces.
- Candy Eyeballs - Just stick them on with melted chocolate - easy peasy.
- Black Decorator Gel - I like using the pre-filled tubes of decorator gel to draw on the mouths. It tends to flow a bit cleaner than the melted chocolate. You could also try using a squeeze bottle with the melted chocolate. Do what works for you!
Can I Make These In Advance?
These are best eaten when very fresh - within a day or two of making them - though they will remain safe to eat for several days. Store them in an airtight, cool, dry place to help them stay softer for longer.
Can They Be Frozen?
Yes, they can! You can freeze the finished Frankenstein Rice Krispie treats.
To Freeze: Make sure the treats are completely cooled and that the chocolate and candy is set up and hardened. Wrap each treat tightly in plastic wrap and place into a large freezer-safe Ziploc-safe storage bag. Advice varies on how long the treats can stay frozen without a noticeable decrease in quality - anywhere from 6 weeks to 6 months. I think that if the treats are well-packed so that no air gets to them, you won't have an issue keeping them on the longer end of that timeframe.
To Thaw: Unwrap the treats so that no condensation forms as the treats thaw - this can make the treats gummy. Let them come to room temperature and serve.
Print
Frankenstein Rice Krispie Treats
Fun neon green Rice Krispies treats decorated like cute Frankenstein faces for Halloween! An easy treat that the kids can help you make.
- Total Time: 15 mins + cool time and decorating
- Yield: 12 treats
Ingredients
- 3 TBS butter
- 1 10-ounce bag of mini marshmallows
- Neon green food coloring
- Small pinch of salt
- ½ tsp vanilla extract
- 6 cups Rice Krispies cereal
- Candy eyeballs
- Black or dark chocolate candy melts
- Black decorator gel, optional
Instructions
- Spray a 9x13 pan with cooking spray and set aside.
- On the stove in a medium saucepan over medium-low heat, melt the butter. Add the marshmallows and stir constantly with nonstick spatula until almost melted.
- Add several drops of the neon green food coloring. Stir, then add more as needed until desired color is reached.
- Remove from heat, stir in the vanilla extract and salt. Add the Rice Krispies and stir until fully coated.
- Spread the treat mixture evenly into the prepared pan and press down lightly. Let cool so they set up.
- Use a long sharp knife to slice treats into 12 squares. Arrange the squares on wax paper, leaving a little space between each one.
- Place about ⅔ cup of chocolate candy melts into a zipper storage bag. Microwave at half power for 20-30 second increments. Massage the bag after each increment until chocolate is fully melted. Be careful, the bag will get hot.
- Snip a very small piece of the corner off of the bag and use it to pipe hair onto the treats. Add two dots for the eyes and attach candy eyeballs. Create mouth shapes as desired (*you can also use black decorating gel in the tube for drawing mouth shapes)
- Allow chocolate to harden and serve. Store leftovers in a cool, dry place in an airtight container for up to 5 days.
Notes
Instead of a 10 ounce bag of marshmallows, you can use 1 7-ounce jar of marshmallow creme.
Use fresh marshmallows
For best results, use real butter instead of margarine.
- Prep Time: 5 mins
- Cook Time: 10 mins
- Category: Dessert
- Method: Stovetop
Not making this recipe just yet? Use the image below to pin to your Pinterest boards! You can also share with your friends on social media by using the buttons at the top or bottom of this post. Thanks for visiting!
Say Something About This Post: